- Home
- Videos
- Conveyor Maintenance
- Drive Wheel
Drive Wheel Change on Friction-Driven Conveyor
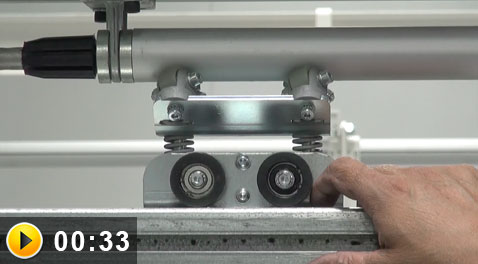
We will begin with defining the drive wheel. In essence, it is part of the trolley assembly and consists of four wheels that are spring-loaded up to the bottom of the drive tube. The wheels are mounted to the drive head with 1/6 screws and each wheel on the drive head is surrounded by the wheel holders.
The drive head is spring loaded up against the drive tube of the conveyor by the trolley body which houses the load wheels and the guide wheels of the trolley assembly.
The only consumable item of the trolley assembly is the drive wheels. They are good for 40,000 hours of production.
Drive Wheel Change Basic Instructions
There are a couple of methods that can be used to replace drive wheels in a system.
The best method for replacing drive wheels when the trolley is engaged with the tube is to loosen the socket head cap screw that attaches each individual wheel holder and wheel to the drive head.
Each wheel has its own screw holding it in place. Once the screw is loosened, press down on the drive head with your hand and pop the wheel assembly out.
Release the drive head. It is best to keep the wheel assemblies in stock and replace the whole unit as one.
Once removed, replace it with the new wheel assembly by pressing down on the drive head and slipping the new wheel assembly (wheel/wheel holder) into place and lining it up into position with the drive tube.
Replace and tighten the socket head cap screw to the drive head and maintenance is complete.


